Although my research mostly focuses on Software Engineering and Model-Driven Engineering, I also have long experience acting as a(n amateur) sysadmin in all the research groups I’ve been working in.
Since virtual machines and OS-level containerization have become widespread with negligible overhead, I’ve prefered this solution (as opposed to application containers, such as Docker) to develop and deploy new applications both at home and work infrastructures. And if such VMs and OS containers can act as “real” machines directly connected to the network (without the need of port forwarding or proxies), the better.
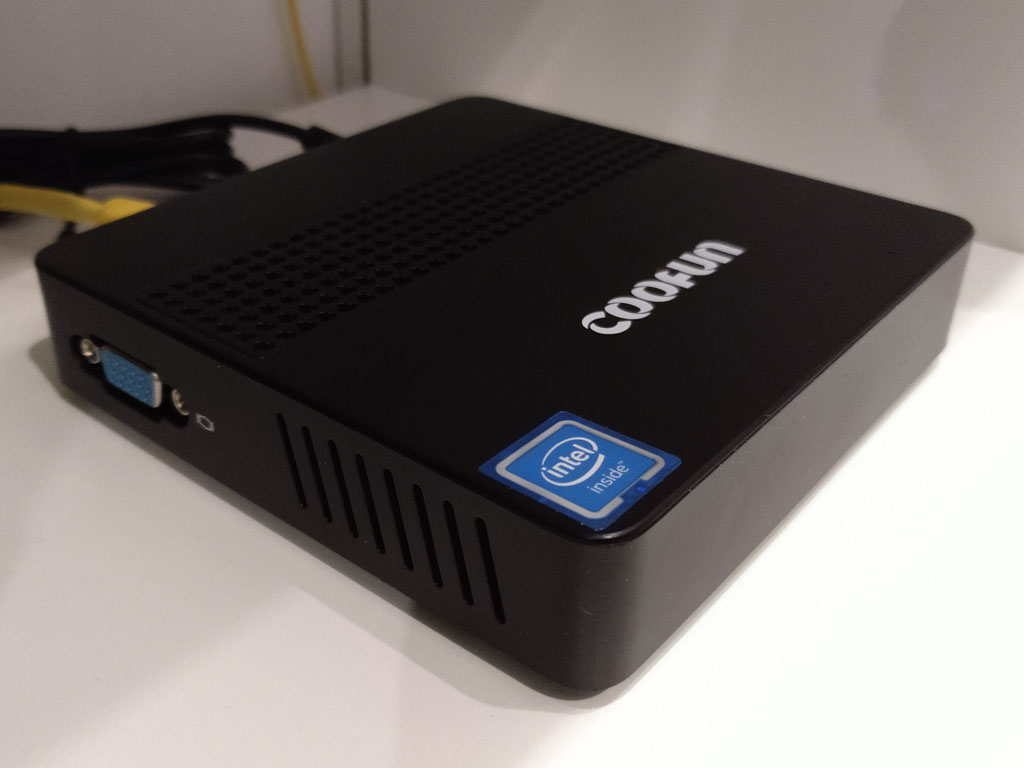
I’ve been a big fan of Proxmox VE since I discovered it nearly one decade ago. It is powerful, it is highly configurable since it is built on top of a full Debian system, and more important, it’s open source! However, Proxmox is targeted to work on powerful servers and only supports x86_64 architectures. That doesn’t mean that it cannot be used in more limited hardware (see below), but I wondered what other solutions could be used in a home environment to support a similar need of virtual machines and/or containers.
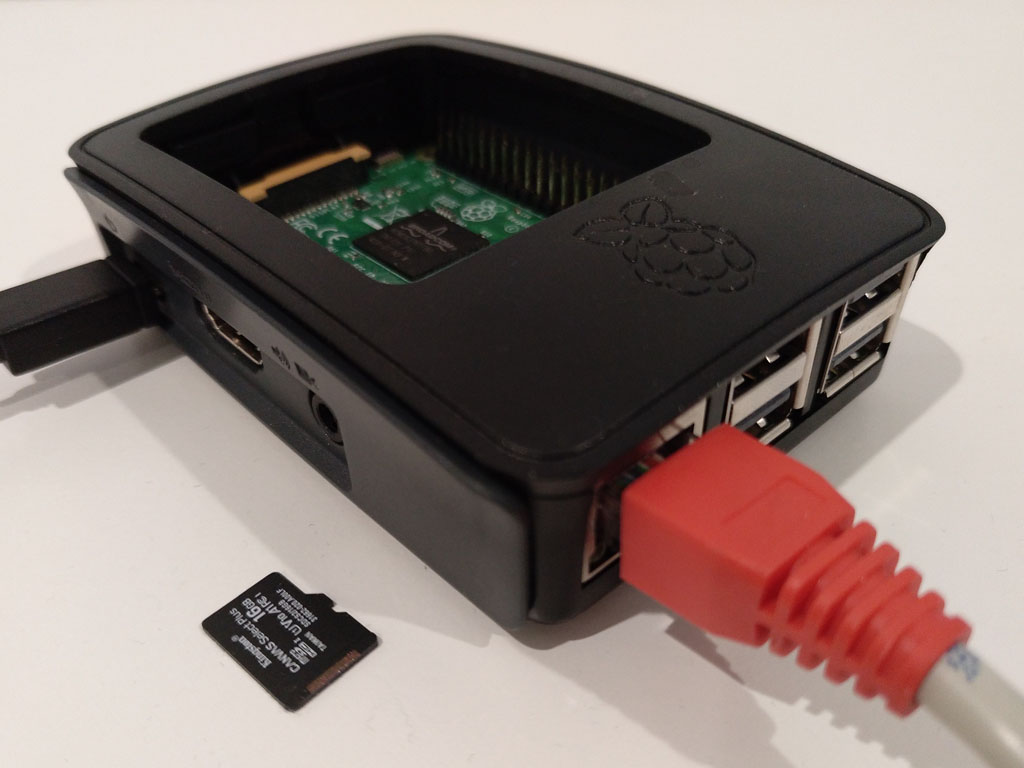
And here’s where the Raspberry Pi came to my mind. I have several ones acting as home media players, and indeed I bought a Raspberry Pi 4 around one year ago to take advantage of its improved network bandwith and computing power to install several TV tuners, a VPN server and other services I already had in a Raspberry Pi 3. Since now I have the mini PC to host most of the most demanding home services, I thought that it could be funny to use a Raspberry Pi 4 to virtualize full OS-level containers. Finally, to my surprise, the procedure is quite simple. Here’s how I did it.
What you’ll need
- A Raspberry Pi. I normally use a Raspberry Pi 4 with 4GB of RAM for this setup, and it works flawlessly, but older models also work at the cost of being slower. I tested this tutorial with a Raspberry Pi model 3.
- An SD Card. I recommend one of at least 64GB of capacity or bigger. An external hard drive/thumb drive/network drive may also be used, but it will have to be permanently connected.
- A wired ethernet connection. It is not possible to use the wifi interface of the Raspberry Pi to create a network bridge to expose the OS containers publicly.
- A DHCP server in your network which assigns free IPs when new devices request them. Any common home network will have a DHCP server activated by default.
NOTE: If you are limited to use only your wifi connection, OS containers can connect to the network via NAT; and can be accessed from the network via a proxy device. In such a case, forget about point number 4 above, and skip all the bridge-related stuff below (but then, where’s the fun?).
First step: Install Raspbian (Buster) in an empty SD card
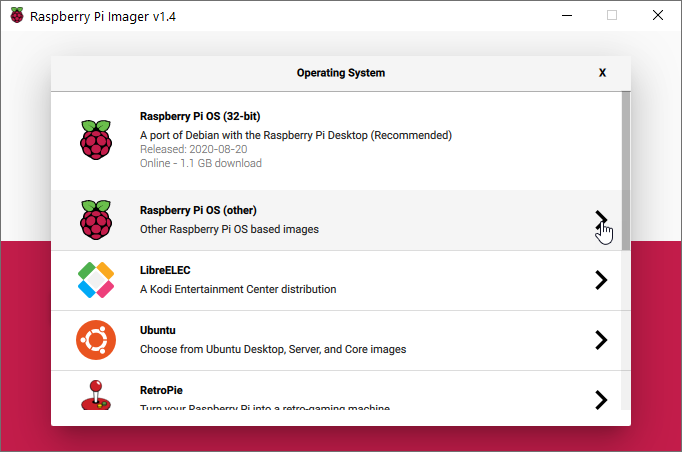
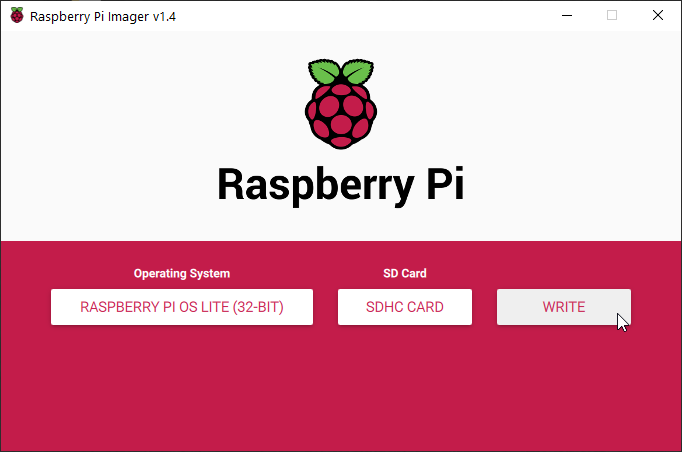
To install Raspbian in an SD card, you can use the Raspberry Pi Imager. The process is really easy. Remember that the contents of the SD card will be lost!
I recommend using a bare minimum system for this setup. To install it:
- Select “Raspberry Pi OS (other)”.
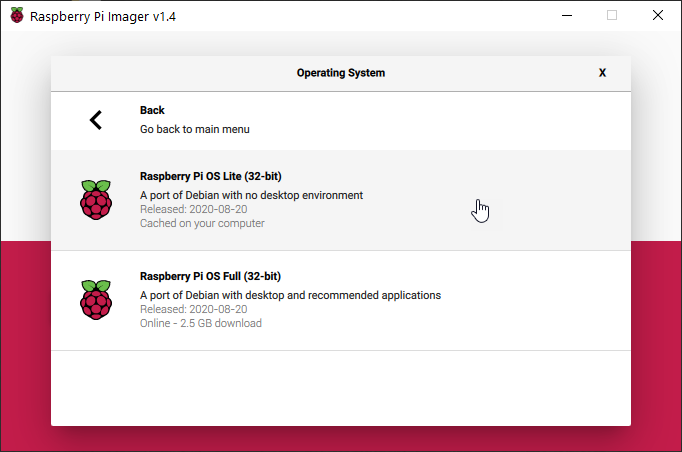
- Select “Raspberry Pi OS Lite (32-bit)”.
- Select the SD Card where you want to install the system.
- Click on WRITE.
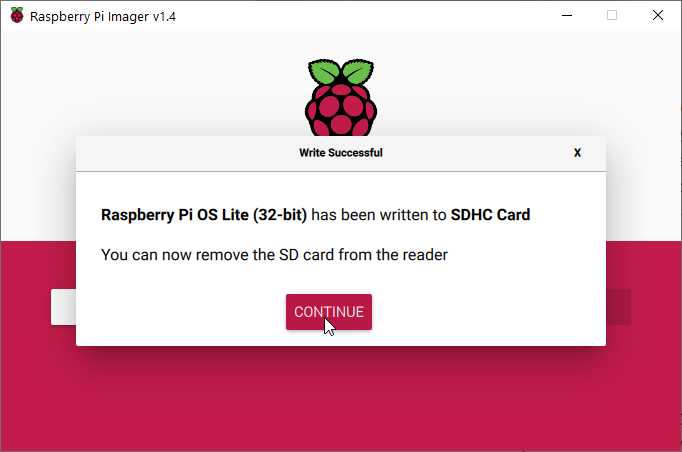
- Once the process is done, the SD card is unmounted and can be removed from the reader.
TIP: Remember that if you want to do the next configuration steps via SSH, you must insert the SD card again, and you must create an empty ssh file in the boot partition.
TIP: By default, you should be able to connect to your Raspberry Pi using the raspberrypi.local domain name if no other device in the network uses the same name and your system support the mDNS protocol (such as Windows 10, or Linux if avahi-daemon is running).
Second step: Prepare the system and create a network bridge
Insert the SD Card in the Raspberry Pi and open a terminal console.
TIP: Remember that the default user / password of Raspbian are pi / raspberry. I strongly recommend you to change this default password to one of your liking ASAP.
TIP: At this step and before continuing, you may want to configure some initial stuff of the system, such as the time zone, the keyboard layout, or the network name. All these functions are available via the raspi-config utility. If you are using any kind of external storage, this is the moment to configure it too.
TIP: All the commands in this guide need to be executed as root, and as a consequence, I recommend you to directly get a root shell by executing:
sudo su -
In order to create a network bridge, first we’ll need to install the bridge-utils package:
apt-get -y update
apt-get -y install bridge-utils
Next, we will need to create the network bridge, and we will attach our wired network interface to it. We will do it by creating a dedicated network interface file, e.g.:
nano /etc/network/interfaces.d/br0
With the following contents:
iface eth0 inet manual

auto br0
iface br0 inet dhcp
  bridge_ports eth0
Another thing to keep into account is that Raspbian uses the dhcpcd daemon to get IP addresses from the DHCP server in the network. As such, we must exclude eth0 from getting any IP from now on (since it will receive it via the bridge). For that, we must edit the dhcpcd configuration file:
nano /etc/dhcpcd.conf
And then, we must add the following line at the end of the file:
denyinterfaces eth0
NOTE: Since we did not configure the wifi interface, there’s no need to explicitly disable the wlan0 interface neither in /etc/network/interfaces.d/br0 nor /etc/dhcpcd.conf. If you want to disable wlan0, add it to the denyinterfaces list, and add the line iface eth0 inet manual in the interfaces file.
At this point, you should restart your system in order to all changes take effect.
Once the system has restarted, you should see something like this when executing the ip a command in the shell. Notice that eth0 does no longer have an IP address, but it is the bridge interface br0 that has it.
root@raspberrypi:~# ip a
1: lo: <LOOPBACK,UP,LOWER_UP> mtu 65536 qdisc noqueue state UNKNOWN group default qlen 1000
    link/loopback 00:00:00:00:00:00 brd 00:00:00:00:00:00
    inet 127.0.0.1/8 scope host lo
       valid_lft forever preferred_lft forever
    inet6 ::1/128 scope host
       valid_lft forever preferred_lft forever
2: eth0: <BROADCAST,MULTICAST,UP,LOWER_UP> mtu 1500 qdisc pfifo_fast master br0 state UP group default qlen 1000
    link/ether ab:72:be:a2:fd:30 brd ff:ff:ff:ff:ff:ff
3: wlan0: <BROADCAST,MULTICAST> mtu 1500 qdisc noop state DOWN group default qlen 1000
    link/ether ab:72:be:f7:a8:45 brd ff:ff:ff:ff:ff:ff
4: br0: <BROADCAST,MULTICAST,UP,LOWER_UP> mtu 1500 qdisc noqueue state UP group default qlen 1000
    link/ether ab:72:be:a2:fd:30 brd ff:ff:ff:ff:ff:ff
    inet 192.168.0.70/24 brd 192.168.0.255 scope global dynamic br0
       valid_lft 172666sec preferred_lft 172666sec
    inet6 fe80::ba27:ebff:fea2:fd30/64 scope link
       valid_lft forever preferred_lft forever
root@raspberrypi:~#
Third step: Install LXD
Next, we will install LXD. LXD is a system container manager used to manage LXC, an operating-system-level virtualization method. LXD provides higher-level administration methods than “pure” LXC. LXD is not available as a Debian package, but, alternatively, it can be installed from snap instead.
Installing snap is as simple as executing:
apt-get -y update
apt-get -y install snapd
At this point, snap developers recommend to restart the root session so that the new files placed by snapd in /etc/profile.d/ are correctly reloaded and the lxd binary is available in the path. Nevertheless, reloading the system-wide environment profile seems to work:
source /etc/profile
Now you can safely execute snap commands to install LXD:
snap install core
snap install lxd
Once LXD has been installed, it must be initialized. LXD is initialized by running:
lxd init
NOTE: It is not strange to get the following error several times.
ERROR: ld.so: object '/usr/lib/arm-linux-gnueabihf/libarmmem-${PLATFORM}.so' from /etc/ld.so.preload cannot be preloaded (cannot open shared object file): ignored.
It will be only shown for the first time, and can be safely ignored.
LXD is initialized via an interactive set of questions. I recommend you to select the default answers (just press ENTER), with the exception of the Size in GB of the new loop device: that will be the maximum size you’ll be able to use for you containers in total. The default size below varies depending on the size of the SD card used (in the example below, I used a 16GB SD card).
Would you like to use LXD clustering? (yes/no) [default=no]:
Do you want to configure a new storage pool? (yes/no) [default=yes]:
Name of the new storage pool [default=default]:
Name of the storage backend to use (dir, lvm, ceph, btrfs) [default=btrfs]:
Create a new BTRFS pool? (yes/no) [default=yes]:
Would you like to use an existing empty block device (e.g. a disk or partition)? (yes/no) [default=no]:
Size in GB of the new loop device (1GB minimum) [default=5GB]: 8GB
Would you like to connect to a MAAS server? (yes/no) [default=no]:
Would you like to create a new local network bridge? (yes/no) [default=yes]:
What should the new bridge be called? [default=lxdbr0]:
What IPv4 address should be used? (CIDR subnet notation, “auto” or “none”) [default=auto]:
What IPv6 address should be used? (CIDR subnet notation, “auto” or “none”) [default=auto]:
Would you like LXD to be available over the network? (yes/no) [default=no]:
Would you like stale cached images to be updated automatically? (yes/no) [default=yes]
Would you like a YAML "lxd init" preseed to be printed? (yes/no) [default=no]:
Now, LXD is up and running. If you plan to use the OS-level containers behind NAT and you plan to use proxy devices to expose services in containers, you are done.
If you want to create a network bridge in such a way that OS-level containers will act as actual computers directly connected to your home public network, go to the next step.
NOTE: With the above settings, you’ll have to give access to LXD containers to the “public” network via a specific profile as explained in Step 4. This way allows having both “private” and “public” containers. If you want to create only “public” containers by default by directly attaching them to the br0 bridge, answer the following questions as indicated:
Would you like to create a new local network bridge? (yes/no) [default=yes]: no
What should the new bridge be called? [default=lxdbr0]: br0
Configuring LXD in this way also makes Step 4 unnecessary.
Fourth step: create an LXC profile to connect containers to the public network via the bridge
When we initialized LXD, we created a default profile with an “internal” network not visible from outside our LXD installation.
NOTE: The following commands that create a new container only illustrate what this “internal” network looks like. They are not needed to configure the profile:
lxc launch images:alpine/edge demo-default
After creating the image, we can see that the image has assigned a private IP in a network different from our public network:
root@raspberrypi:~# lxc list
+--------------+---------+----------------------+-----------------------------------------------+-----------+-----------+
|     NAME     |  STATE  |         IPV4         |                     IPV6                      |   TYPE    | SNAPSHOTS |
+--------------+---------+----------------------+-----------------------------------------------+-----------+-----------+
| demo-default | RUNNING | 10.52.126.199 (eth0) | fd42:4c87:ca18:6195:216:3eff:fe3e:4643 (eth0) | CONTAINER | 0         |
+--------------+---------+----------------------+-----------------------------------------------+-----------+-----------+
root@raspberrypi:~#
If we want containers to be attached to our public network we need a specific profile. For this, we will create a profile called bridged:
lxc profile create bridged
NOTE: Next, we are going to edit the bridged profile. If no default editor is set, LXD will choose a default editor, such as vi. If you prefer to use another editor, such as nano, set the EDITOR variable to the editor of your liking.
export EDITOR=nano
If you want to make this change permanent, modify your profile by running:
echo 'export EDITOR=nano' >> ~/.profile
source ~/.profile
Now, we can configure the bridged profile to use our newly created br0 bridge with our preferred editor:
lxc profile edit bridged
An editor will open, and there we can set the following contents (the important part is the devices section):
config: {}
description: ""
devices:
  eth0:
    name: eth0
    nictype: bridged
    parent: br0
    type: nic
name: bridged
used_by: []
Save the editor, and close. From now on, containers with both the default and bridged profiles will be seen in the network as independent computers with their own IP.
We’ve finished configuring our setup!
NOTE: Now we will create a demo container that will use the bridged profile. These steps, again, are only for illustrative purposes.
lxc -p default -p bridged launch images:alpine/edge demo-bridged
NOTE: it is important to specify first the default profile, and second the bridged profile. This is because the bridged profile overwrites the network settings of the default profile.
Now, if we list the containers, we see that the new container is directly attached to our public network:
root@raspberrypi:~# lxc list
+--------------+---------+----------------------+-----------------------------------------------+-----------+-----------+
|     NAME     |  STATE  |         IPV4         |                     IPV6                      |   TYPE    | SNAPSHOTS |
+--------------+---------+----------------------+-----------------------------------------------+-----------+-----------+
| demo-bridged | RUNNING | 192.168.0.91 (eth0)  |                                               | CONTAINER | 0         |
+--------------+---------+----------------------+-----------------------------------------------+-----------+-----------+
| demo-default | RUNNING | 10.52.126.199 (eth0) | fd42:4c87:ca18:6195:216:3eff:fe3e:4643 (eth0) | CONTAINER | 0         |
+--------------+---------+----------------------+-----------------------------------------------+-----------+-----------+
root@raspberrypi:~#
Now, both demo containers can be stopped and deleted by executing:
lxc stop demo-bridged demo-default
lxc delete demo-bridged demo-default
Bonus step 1: automating the backup of LXD containers and images
If you have attached an external / network storage, you may want to perform automatic backups of your containers and images. Yo can easily create weekly backups by creating an executable shell script in /etc/cron.weekly/ with the following contents (the script assumes the backup storage is mounted in /mnt/backups, it can be changed by modifying the basedir variable):
#!/bin/bash

export PATH=$PATH:/snap/bin

basedir="/mnt/backups"
now=$(date +'%Y%m%d.%H%M')

## Uncomment this if 'basedir' is in a remote filesystem to ensure it's mounted before continuing
# mount "$basedir" || exit $?

## Dump LXD server config
lxd init --dump > "$basedir/$now.lxd.config.txt"

## Dump all instances list
lxc list > "$basedir/$now.lxd.instances.list.txt"

## Make sure we know LXD version too
snap list lxd > "$basedir/$now.lxd.version.txt"

## Backup all Instances
for instance in $(lxc list -c n --format csv)
do
  echo "Making backup of '$instance'..."
  lxc export "$instance" "$basedir/$now.ins.$instance.tar.gz" --instance-only
done

## Backup all local images
for image in $(lxc image list -c fl --format csv)
do
  fp=$(echo $image | awk -F ',' '{ print $1 }')
  alias=$(echo $image | awk -F ',' '{ if ($2) print $2; else print "no-alias"; }')
  echo "Making backup of '$fp ($alias)'..."
  lxc image export "$fp" "$basedir/$now.img.$fp.$alias"
done
NOTE: The script does not rotate the backups, so be sure to monitor the free space left in the backup storage regularly to manually delete the older backups.
Bonus step 2: Installing a graphical user interface to manage LXD containers
If you want to use a nice GUI to create and mange LXD containers, I recommend you to try LXDMosaic.
Complex features are a bit unstable and the GUI is still a bit buggy, but for managing and issuing the basic LXD commands works perfectly. It is actively developed and new features are released frequently. If you don’t need a rock-solid, production system, it is very promising.